There is a significant amount of cleaning that has to be done upon moving in, regardless of whether you are buying or renting. In spite of their best intentions, the previous occupant(s) of your new home will have left behind a layer of filth that has to be cleaned away before you can call it home. Unless you’ve just moved into a spanking new building, that slate isn’t as blank as it seems to be at first glance.
It is much easier to clean a home before moving in, as you won’t have to maneuver around a lot of furniture or boxes. If you clean a house before moving in, you won’t have to deal with these extra difficulties. However, if you need to put the cleaning off until after the move, it is also OK; just be sure not to miss it totally. The same is true in the event that a cleaning staff was there previous to your receiving the keys to the property. This is one situation in which you definitely don’t want to take any shortcuts.
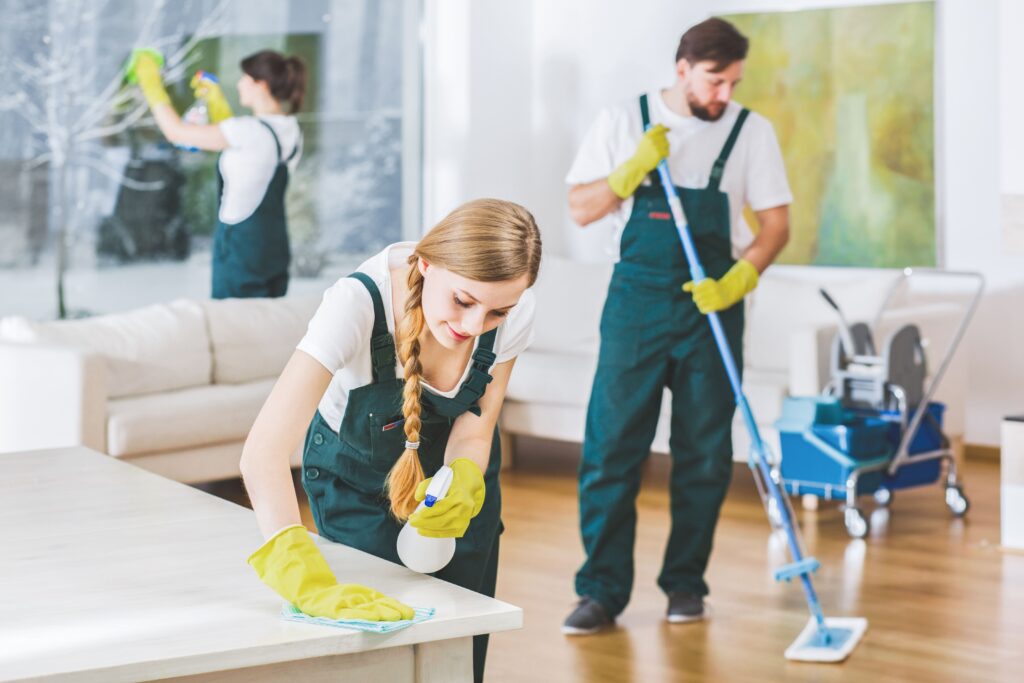
There are many stages to take in cleaning, but with little elbow grease and a helping hand, you should be done in a day or two. Here are some pointers to help you get started.
Click here – Understanding Depression and its Treatment Options
Before You Clean The Low, Clean The High.
The only places where dust may be found are the floors and the counters. It’s not only the floor that may become dirty by neglecting to clean the area directly underneath the ceiling, but also the fans, lights, shelves, and other elements up there as well. Since cleaning these high-up features will make the area below them a little bit dirty, start at the top and work your way down in each room.
The blades of ceiling fans are renowned for causing dust to fall from the ceiling. An old pillowcase should be placed over each blade to reduce collateral damage, and the top layer of the pillowcase should be used to wipe away from the fixture’s center. The majority of the dust that is kicked up will be captured in the case, which, after you are through, you can either wipe clean or throw away.
How To Tidy Up Your Cooking Area
Before you begin cleaning your kitchen, you should begin by removing all of the food from the space. Because moving companies won’t transfer perishable items and won’t move a refrigerator or freezer that is defrosting, you need to make sure that this is taken care of at least two days in advance.
When it comes to transporting big kitchen equipment, preparation might take some time. Cleaning before moving day reduces delays and simplifies the procedure. If you apply our no-obligation moving cleaning home checklist, you will have a decent notion of how to get things rolling.
In The Kitchen, We Suggest You Get Started By Doing The Following:
- To reduce the amount of food that is thrown out, clean up as much space as you can in your cabinets and shelves.
- After you have removed all of the food from the refrigerator, give the inside a thorough cleaning, and don’t forget to shift it about so you can get to all of the areas that are difficult to access. A cloth made of microfibers (https://en.wikipedia.org/wiki/Microfiber), together with some hot, soapy water, can do the work.
- Put away all of the kitchenware, including the appliances, cutlery, and dishes, and mark each box properly. To ensure that you get every portion of the room, clean the locations where they were previously put.
- After dusting with a dry ultra – soft towel, spray the inside of the cabinets gently with multi-surface spray and wipe them down with a moist microfiber cloth to remove any remaining crumbs. If there are any stains or long-lasting food residues, you may need to put in some more effort.
- Completely clean all of the home equipment, including the spaces inside of them, such as the filter in the dishwasher.
- Empty the tray and de-crumb the toaster that is located on top.
- After cleaning the outside, don’t forget to give the interior a quick wipe down as well. You should just need a moist microfiber for this, but if there are any very tenacious stains, you may also microwave a bowl of water to steam the inside. Cleaning the microwave turntable should be done in the same manner as cleaning a dinner plate.
- Clean and disinfect each of the counters by using a multi-surface spray and a microfiber cloth that has been dampened.
- Clean the sink and tub faucets thoroughly, paying special attention to any limescale buildup. This may be accomplished by using a limescale remover that is available without a prescription, such as Viakal, letting it sit for a few minutes, and then washing it off. After you’re done, give it a last polish with a dry cloth to bring out the shine, and be very cautious not to get any limescale remover on any surfaces that are easily damaged.
- Do a thorough job of cleaning the oven. Don’t forget to clean the air extractor, as well as the hob, the switches, and the racks. You will need to make use of an oven cleaning solution in order to assist you with cleaning the inside as well. During the cleaning process for the oven, be sure to lay some newspaper underneath it to protect the floor from any leaking products that may fall. Get a head start on this activity, as the product is frequently most effective if applied the day before and allowed to soak overnight.
When You Are Cleaning Up After A Move, You Should Start With The Refrigerator.
You can put off certain chores until you’ve finished cleaning, but putting away your perishable food isn’t one of them. Start by cleaning and disinfecting your new refrigerator before moving on to anything else. It shouldn’t take any more than twenty minutes since there won’t be any food in the way.
If it’s possible, take out the shelves and drawers, and then clean each one separately with some soap and warm water. Make a solution of moisture and white vinegar, with the proportions kept the same, and use a clean towel to wipe off the interior of the refrigerator. If there is any muck that needs to be removed, let the water and vinegar solution rest for a while and allow it to soak in. After ensuring that the shelves are totally dry, place them back inside the refrigerator. It is necessary to repeat these instructions for the freezer.
A pot of boiling water may be poured over the stubborn residue on your refrigerator’s inside. When the water is comfortable to your touch, go in there and really give it a good scrub down. It ought to be possible to remove the gunk.
Finish Up The Remaining Tasks In The Kitchen.
When you have finished cleaning the refrigerator, you may next go on to the remainder of the kitchen. Step one is to begin at the ceiling and work your way down, beginning with the light fixtures, ceiling corners, and cabinetry.
After that, go on to the rest of the appliances, starting with the cooktop, then the oven, then the microwave, and finally the sink. After that, you should go on to the cabinets and ensure that they are spotless on the inside as well as the exterior, giving particular attention to the knobs of each cabinet. Put finishing the floor on hold for the time being.
A potent mixture for removing tenacious stove top stains is hydrogen peroxide and baking soda. Make a paste by mixing baking soda and hydrogen peroxide in a small basin. Spread it out over the top of the stove, and after waiting fifteen minutes, scrub it.
Moving On To The Restrooms
When you clean a bathroom, you should focus just as much on disinfecting the surfaces as you do on making sure they are pristine. If you want to get rid of any leftover germs, you may use an antibacterial spray after you’ve scrubbed down with blue Dawn dish detergent and a sponge. Regarding the toilet seats, you should go ahead and change them out. It is a little price, but it is the most effective approach to guarantee that they are thoroughly clean.
When you are cleaning the bathroom, it is important not to ignore any unexpected locations that you may normally overlook on a typical cleaning day. Be careful to clean and disinfect the door knobs, light switches, and faucets in addition to the typical areas you would expect to find germs, such as the toilet paper holder.
Stains caused by hard water may be difficult to remove from metal fixtures such as faucets and showerheads. Applying the juice of a fresh lemon on them and rubbing it in will make this process much simpler. The acid is excellent at removing stubborn water stains and restoring metal surfaces to their original luster.
How To Make Your Living Room Look Like New Again
In most homes, the living room is one of the rooms that gets the greatest foot traffic. You will be astounded by the quantity of filth that accumulates over time, particularly in the upholstery and the carpet. As you are putting away the items in your living room, be sure to clean everything thoroughly by wiping it down and removing any dust or cobwebs. After you have completely removed all of the debris and packed everything up, you will have sufficiently cleaned the area to begin a thorough cleaning.
The Following Are Some Of The Methods In Which You May Clean Your Living Room:
- Move all of the bookshelves and cabinets so that you may clean the surfaces thoroughly with a moist cloth. It’s imperative that dry dusting be completed before anything else.
- After moving your TV cabinet, give it a thorough cleaning all the way around.
- You may eliminate any germs that may be present in your carpet, flooring, and upholstery by using a steam cleaner.
- Clean the skirting boards with a damp cloth and use a duster with a long handle to dust the areas that are difficult to access.
- Because they tend to attract a lot of dirt and dust, your drapes and blinds should be dusted and vacuumed regularly. To clean the blind, use a moist towel and work your way up from the bottom to the top of each piece.
- After you are completed, you should vacuum the area to pick up any particles that may have dropped.
Proceed To Deal With The Remaining Area.
Instead of going room by room to finish the cleaning procedure, you should focus on cleaning each item individually. Beginning with the ceiling is the right place to begin since step one instructs you to work from the top down. Don’t forget surfaces that are easy to miss, like the tops of doors and windows, light switches, and the insides of closets. You can remove the dirt and dust from the majority of these locations with the assistance of a quality vacuum attachment. After that, you can use clean, wet clothes to finish the job.
Avoid washing the windows at midday, when the sun’s glare will make dirt and streaks harder to spot. Wait until dark, or at the very least begin with windows in the shadow.
Lastly, Finish Up With The Flooring.
You should finish where you began, which is at the very bottom. First, use an attachment for your vacuum to clean the edges and corners of the floor, and then sweep up any residual material. This method works well for floors made of wood, tile, and linoleum. You shouldn’t attempt to vacuum the whole surface unless the vacuum you’re using is made expressly for it. Mopping is the last step; just be sure to choose a product that is appropriate for the floor type.
It is highly recommended that you make use of a steam cleaner in order to ensure that your carpet is thoroughly cleaned. Hire a handyman or visit a hardware shop to rent one if you don’t have one. Simply vacuuming the carpet won’t remove allergens or significantly improve the air quality, despite the fact that it will make the carpet steam cleaner. And if you’re just going to clean something partially, what’s the point in doing it in the first place?
Grout may be cleaned using a mixture of water and bleach (1:1), then scrubbed with a toothbrush to remove stains and grime. After allowing the solution to rest for about an hour, cleanse the area thoroughly.
Click here – Where Can I Get an Installment Loan?